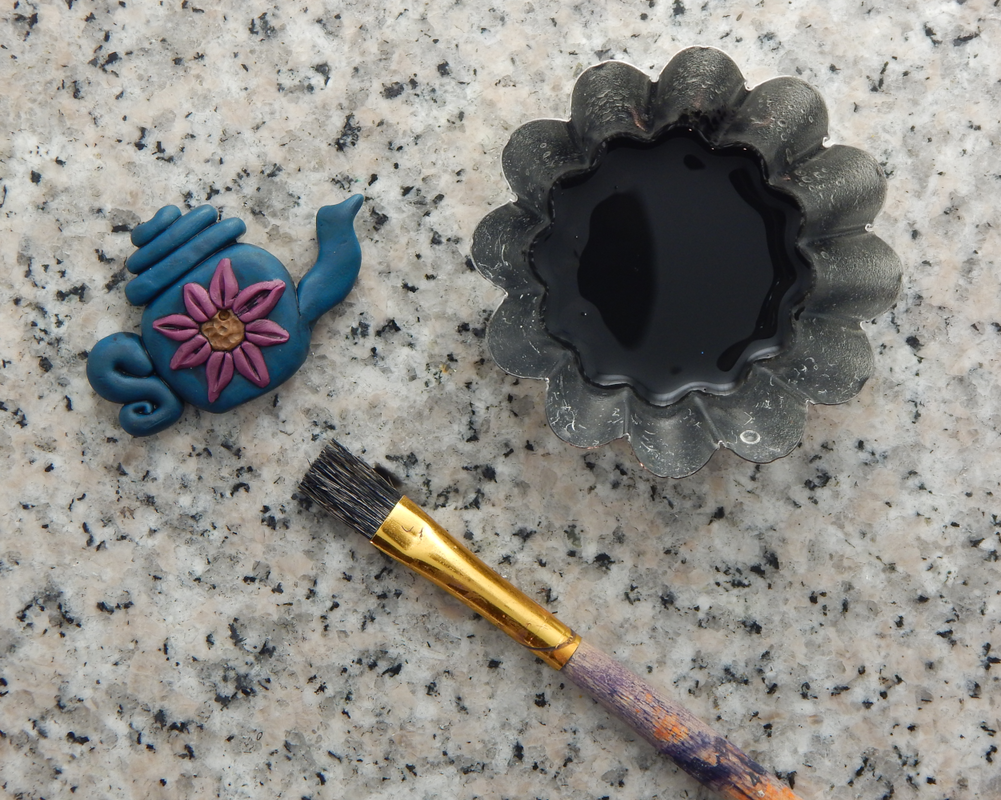
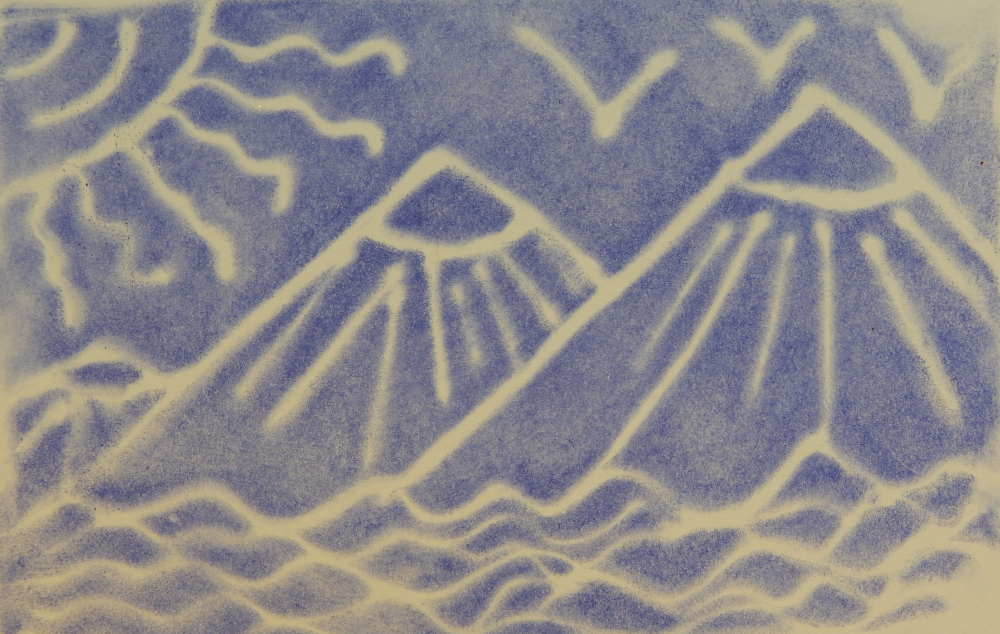
 A video tutorial! How to make prints using craft foam - fun and easy! SuppliesYou will need: Craft Foam Stylus tool (a ball point pen will work as well!) Ink Craft Knife (or scissors) Roller Tool/brayer Paper to print on! How-To-Create a "frame" on your craft foam with the stylus. This will be the size of your print. -Trace your design on the foam with the stylus. Usually going over it twice will be sufficient. The parts you press down with the stylus will be the parts that don't get inked. -Use the craft knife or scissors to cut out your printing block -Tap ink all over the printing block -Press down on paper, and use a roller tool or brayer to press down all areas evenly -Carefully pull up printing block and enjoy! Accent with markers, colored pencils, or paint if desired. 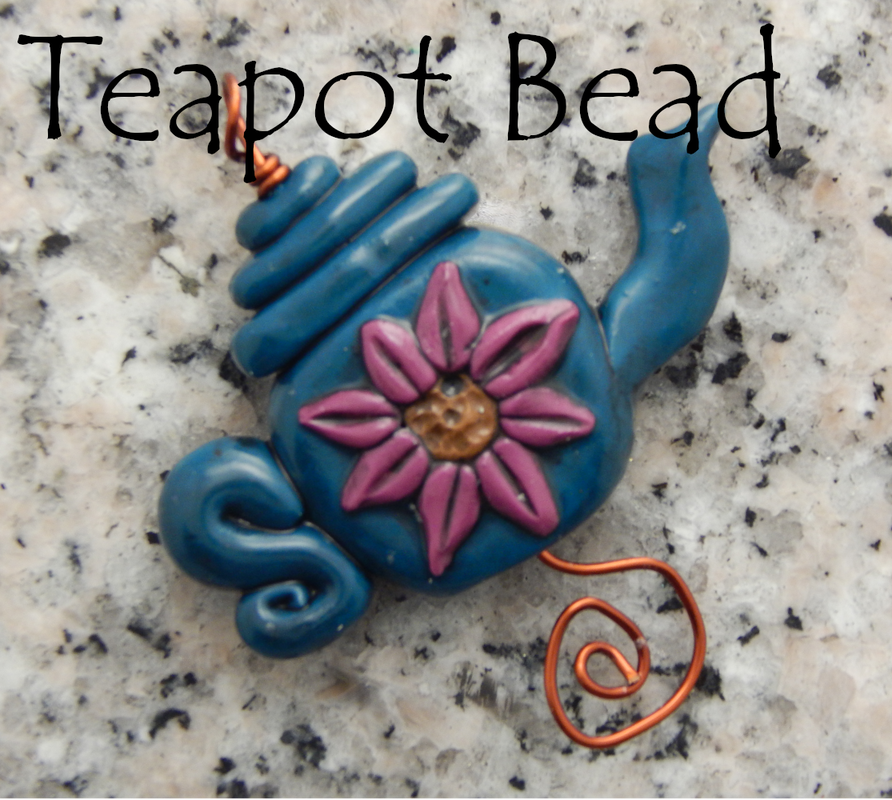 I'm a little teapot, short and stout! A cute little bead or pendant for the tea lovers! If you learn best via video, you can watch below, or scroll down to get the text and pictures tutorial. Or you can utilize both! Yay different modes of learning! (The video had to be sped up in places so it wouldn't be super long, so there is some motion blur happening - just something to be aware of if that is going to bother you! ) This assumes a beginner-to-intermediate knowledge of working with polymer clay. 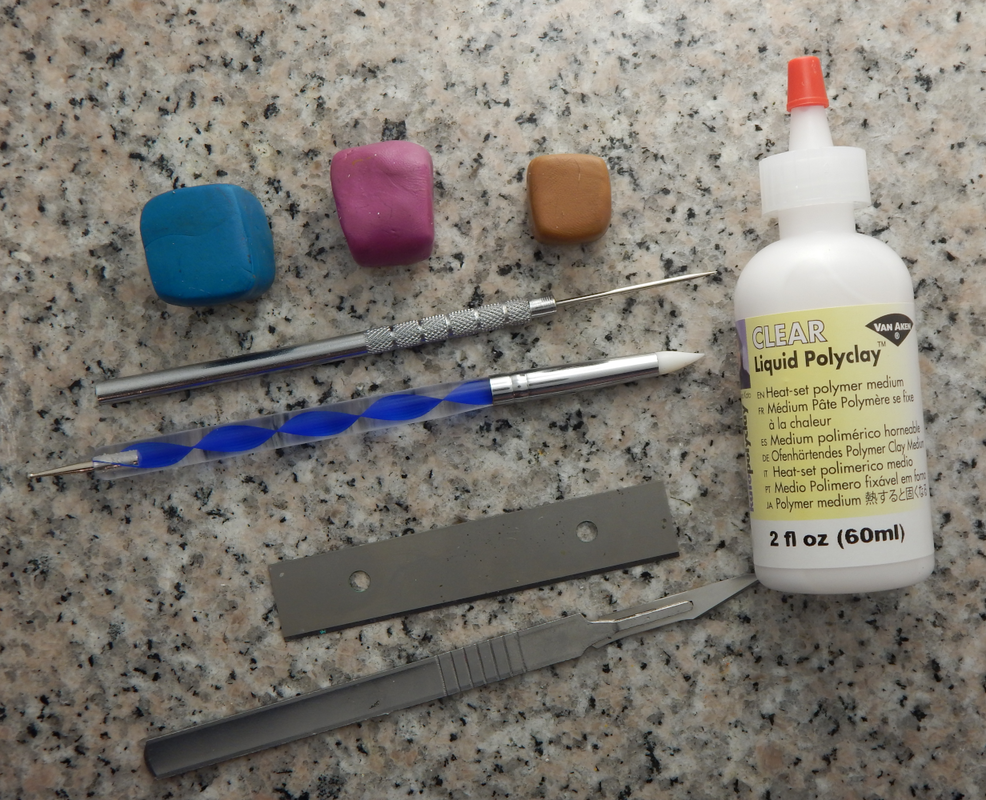 YOU WILL NEED: Three colors of polymer clay (One will be the body of the teapot, one will be the petals of the flower, and one will be the center of the flower.) Needle Tool Clay Shaper Embossing Tool Sharp Blade (I use a wallpaper scraping blade) Sharp Knife (I use a scalpel, but a craft knife would also work) Liquid Polymer Clay ALSO (not pictured) Acrylic Paint Index Card Wire Paint Brush Aluminum Foil Baking tray and parchment paper Instructions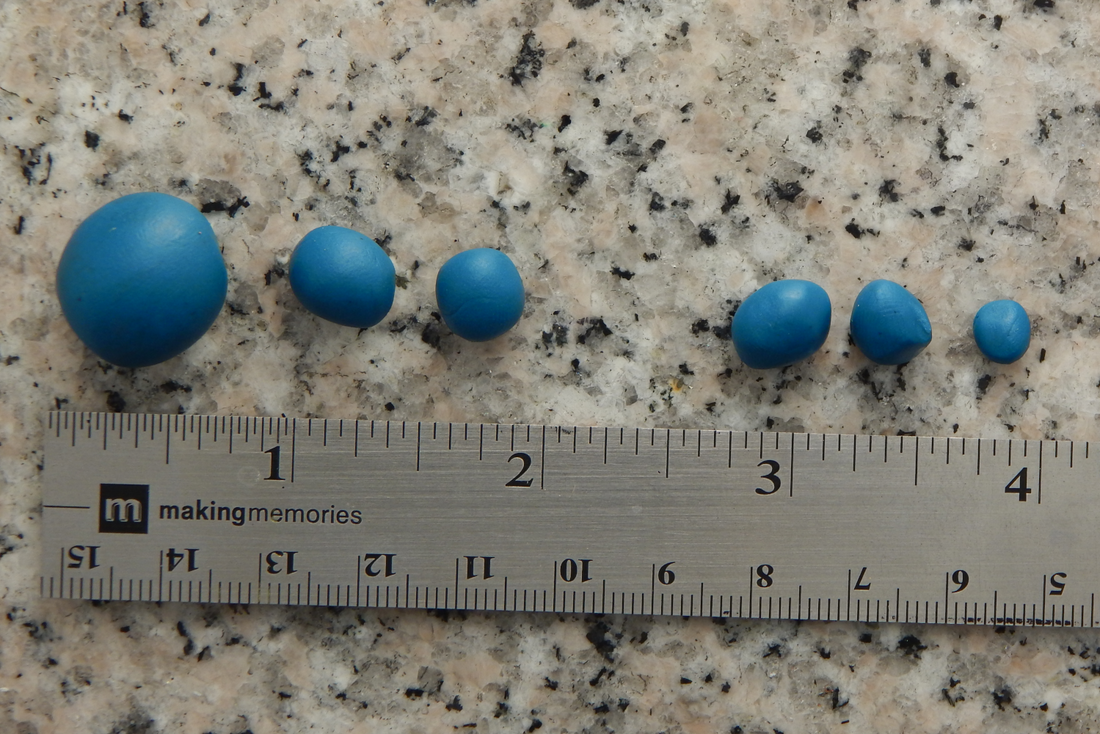 Thoroughly knead and roll your clay to condition it. Roll into a snake and cut six pieces from your main/background color. One large, and two medium(ish) pieces for the teapot body, three smaller pieces for the lid, in decreasing sizes. (This picture is just to give you a very general idea of size. Ruler is in inches. You may have to adjust the amount of each clay piece as you go - as with all things, it gets easier with practice! And hey, it's clay - if you don't like how it looks you can squish it all up and start again before you bake it!
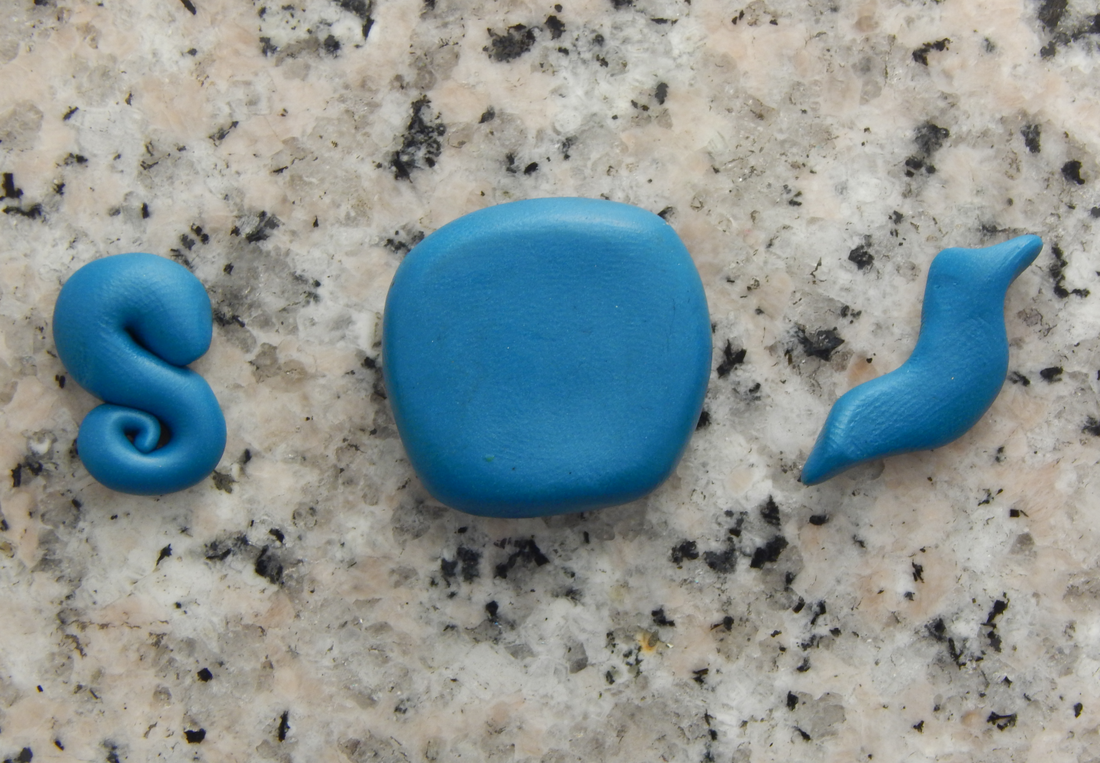
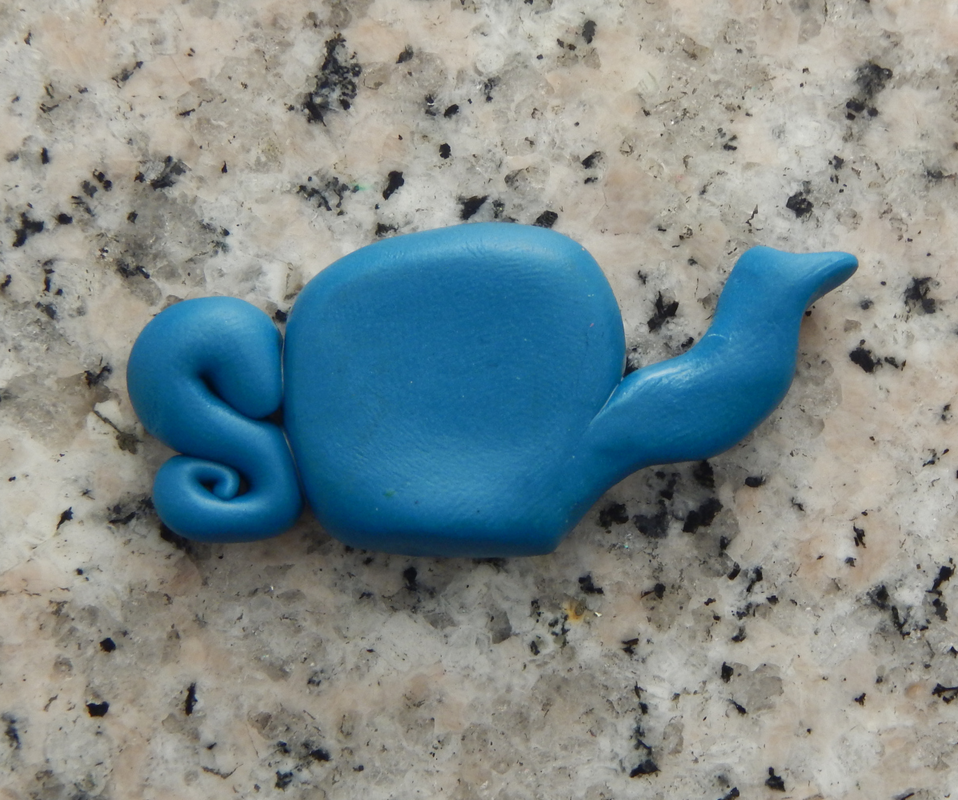
Roll and shape 3 of the pieces into a teapot body, handle, and spout. (Sorry there's no magic formula here, ya just gotta squish the clay around until you are happy with how it looks. The handle and spout both start as a snake and then get shaped, the teapot body starts as a sphere that you then flatten and shape a bit.) Using liquid clay to reinforce the joins, attach the handle and spout to the teapot body. Smooth with clay shaper tool.
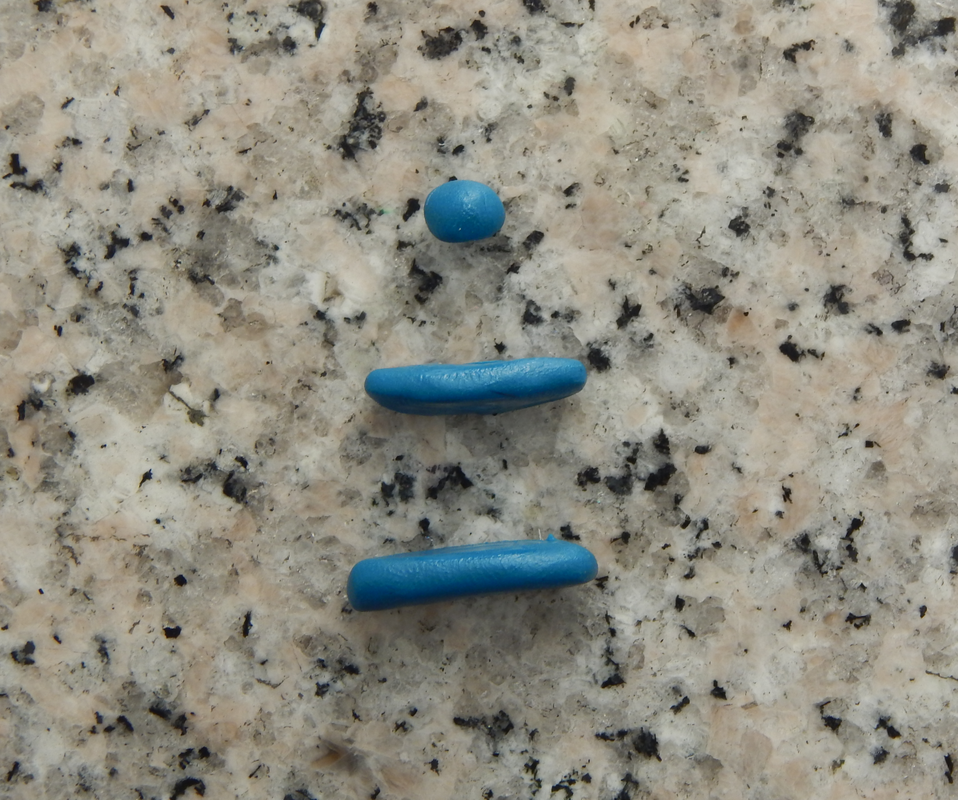
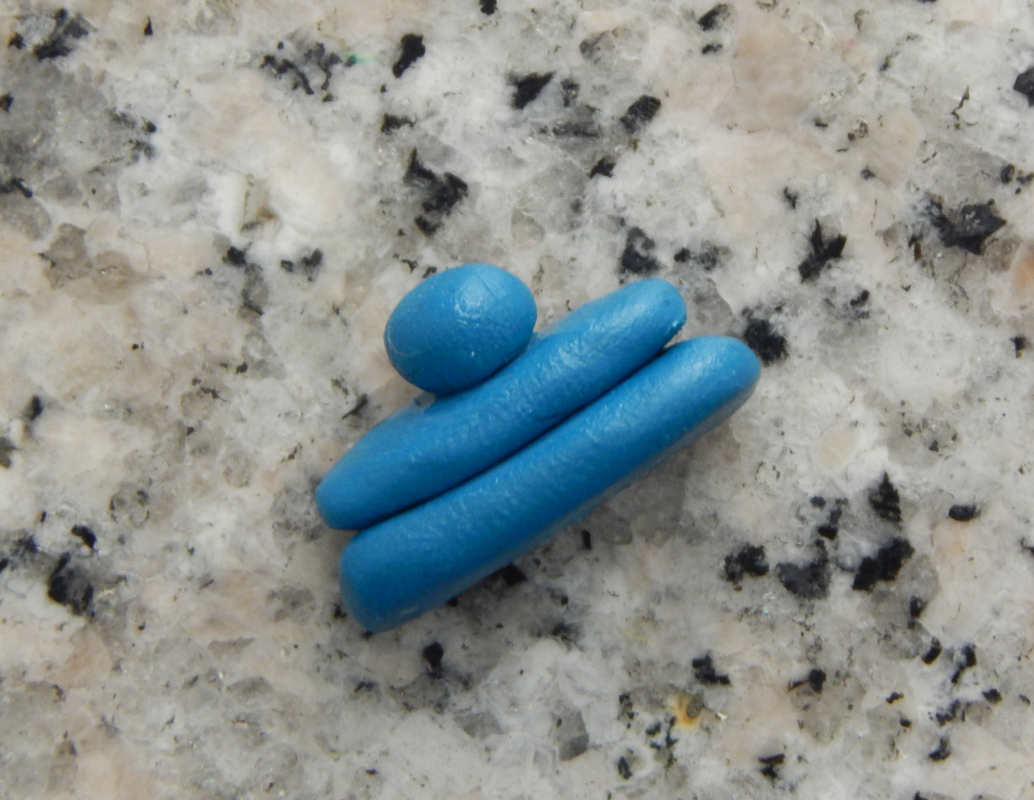
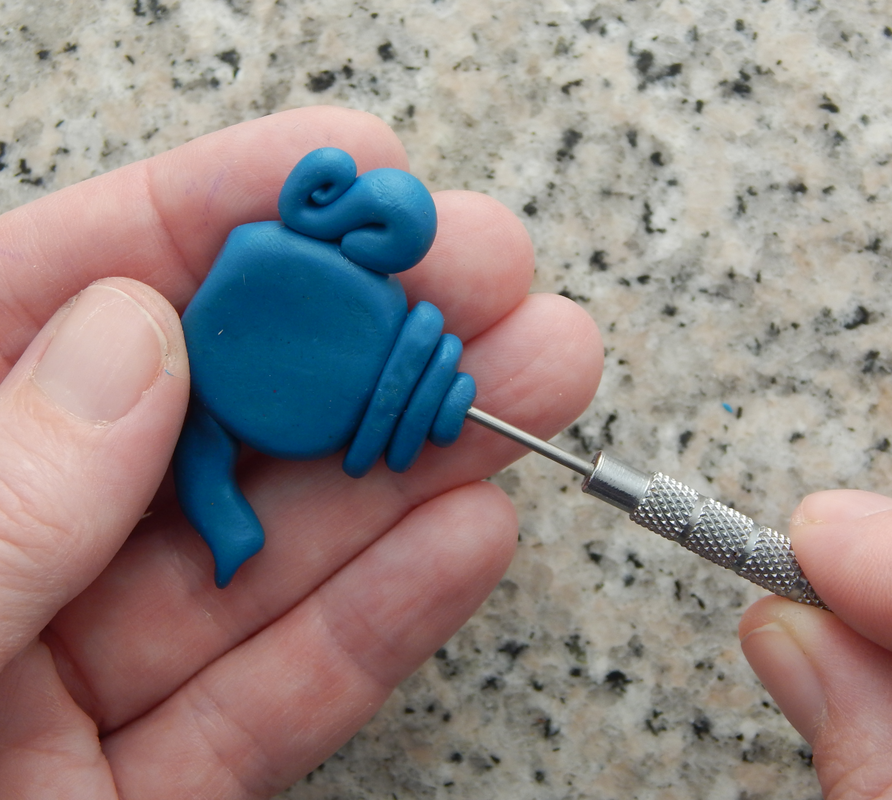
Shape the remaining three pieces of clay into a lid, and then using the liquid clay to reinforce the attachment, put it on the teapot:  (I find it also helps to put a little bit of texture on the top of the teapot with the needle tool before attaching the lid.)
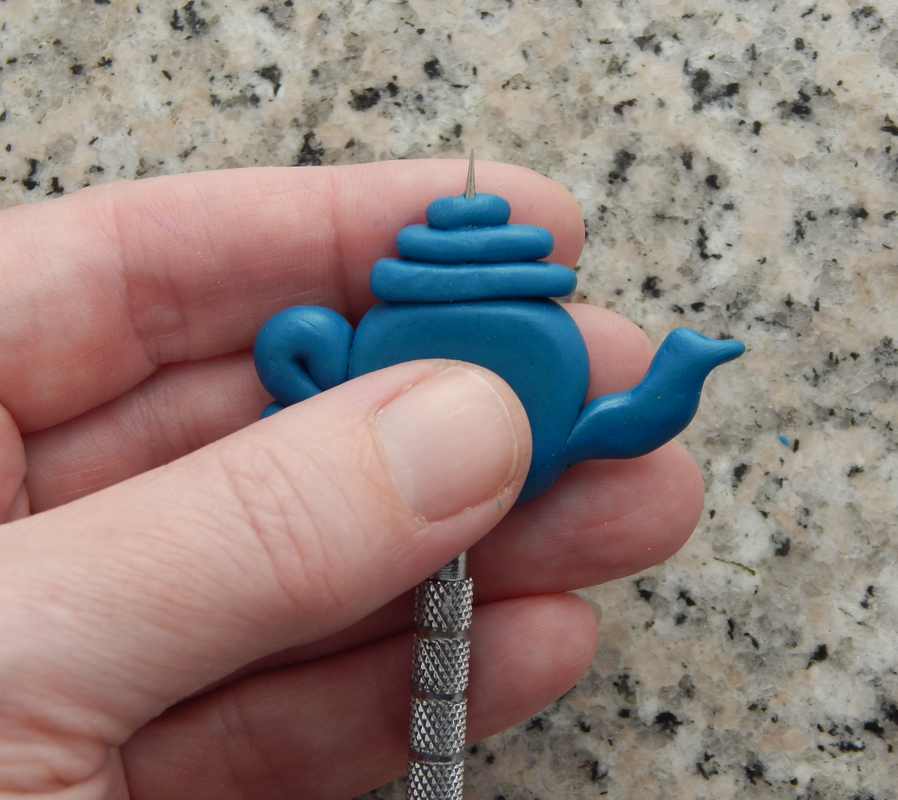
Pierce a hole in your teapot, so it can be a bead! Now, in my early bead making days I remember searching high and low for "The Trick" to making good bead holes. "The Trick" is that there is no trick. Only practice. Sorry. However, that being said, I can give you this advice: - Use a drilling motion, don't try to just ram your needle tool through. - Start on one side, go halfway, start from the other side and try to meet up with that hole and go out where you started. (This is a bit tricky at first, but is helpful to master to get a nice straight hole) - Use a clay shaper tool to tidy up the entrance/exit points a bit. IT'S BAKING TIME!Here's a secret (it's not really a secret:) You can bake polymer clay more than once. So if you, say, wanted to make a teapot bead with a pretty applique flower on it you could bake the base first, and then go back and add the flower. It's much easier that way, and you don't have to worry about inadvertently squishing things you did not mean to squish! I put a piece of parchment paper on my baking tray and cover it with aluminum foil, and then bake at 300F for an hour. This is what I've found works best for me over many years, you may want to check the instructions on your clay packaging. (In general, baking it for longer than the recommended time is fine, getting much above the recommended temperatures can burn your clay and release nasty fumes. (Burnt clay fumes are BAD. If it should happen: turn off oven, turn on fans, move tray somewhere outside, move yourself away from fumes until they have dissipated. If you're careful, it won't happen often, but I have had it happen a time or three.) Oven thermometers are your friend. So is good ventilation. I bake enough clay in a year that I have a dedicated convection oven out in our converted garage studio. For occasional use, your home oven is fine.)
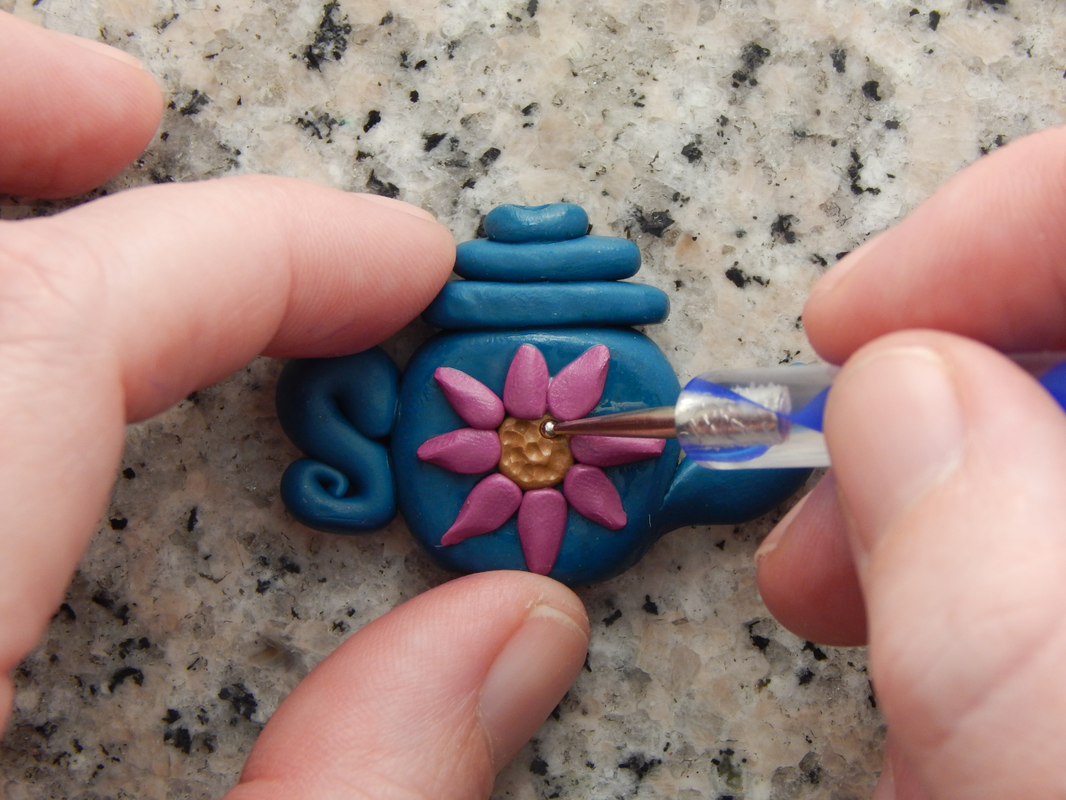
Rub a thin layer of liquid clay onto the teapot body to help with adhesion of your flower. Cut 1 small piece of clay from the flower center color (I like to use a tan or brown color) And 8 pieces of the flower petal color. Roll the flower center into a little ball and press onto the center of the teapot. Roll the flower petal color clay into a small rounded triangle shapes and press around the flower center. (For me it's easiest to do the top, bottom, and sides first, and then go back and add the ones in between.)
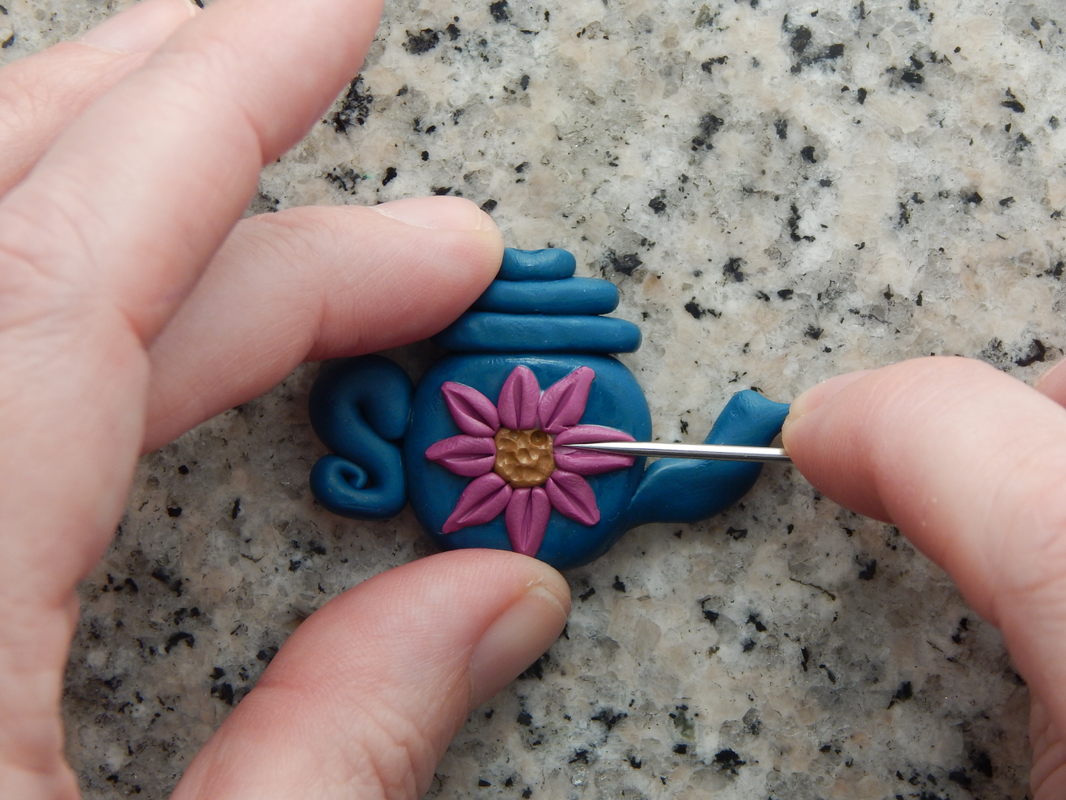
Texture the center of the flower with the embossing tool. Texture the flower petals with the needle tool. Bake! (again)
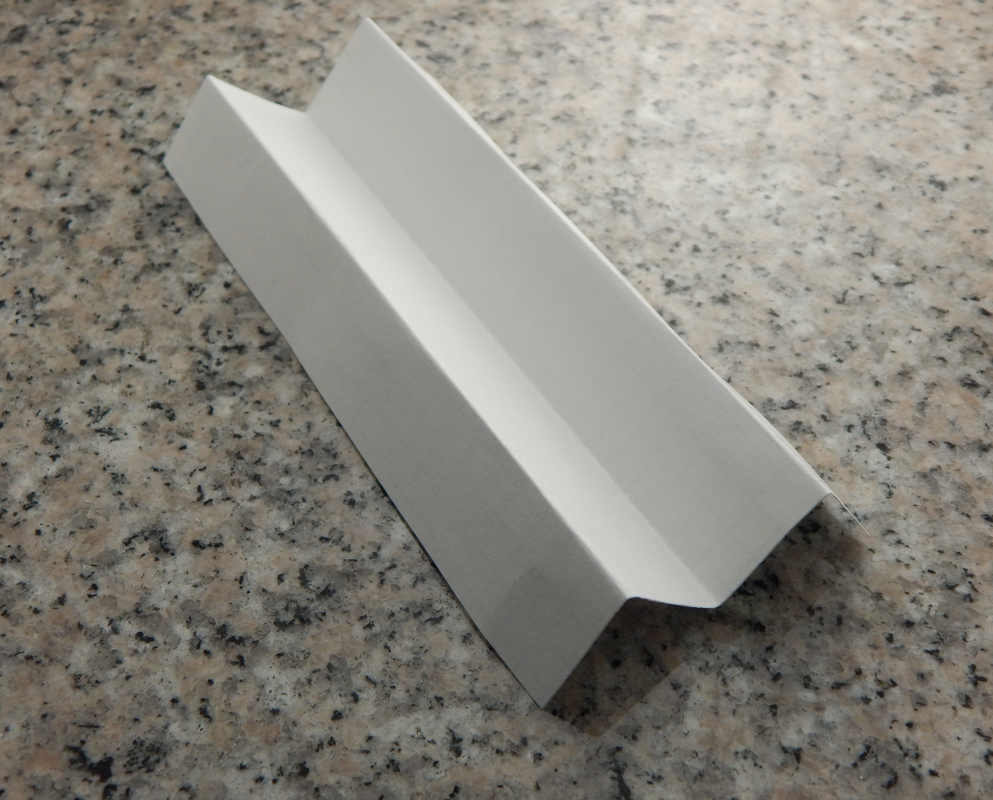
WE ARE ALMOST DONE! Hurrah! Antique the bead if desired. (Brush diluted acrylic paint in brown or black all over bead, making sure to get into the cracks and crevices. Using a somewhat stiff brush is best. Then wipe off most of the paint except for, you guessed it, the paint in the cracks and crevices.) Fold an index card (or other stiff piece of paper- about card stock weight) in an accordion fold to hold the bead. Put the bead on a small piece of wire, use a soft brush to give it a coat of liquid clay, and then prop it on the baking cradle with the wire. (The wire will touch the index card on both the "peaks" of the paper. The bead won't touch the paper and will hang in the "valley." It's at about 6:45 in the video if you need to see to get a good visual.) and now... WE BAKE! (Yes, again. It's the last time. I promise. Because when it comes out of the oven, it is... ALL DONE! (Well except for putting it on a chain or a cord or using it in whatever awesome piece of jewelry you are going to make!) Toss a coin to your crafter: Venmo: @CreativeMoves Paypal.me/CreativeMovesUS A website upgrade means I can host DIY videos here without worrying about annoying YouTube ads! I will be moving tutorials here slowly in the next few weeks, in the meantime you can still visit http://makemesses.com
|