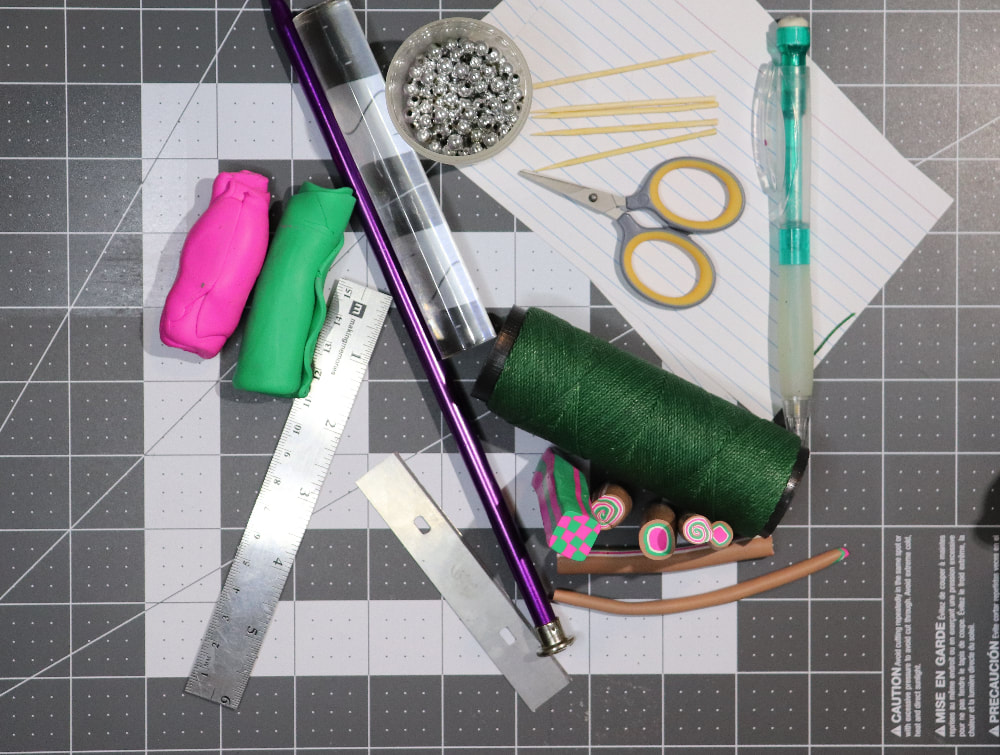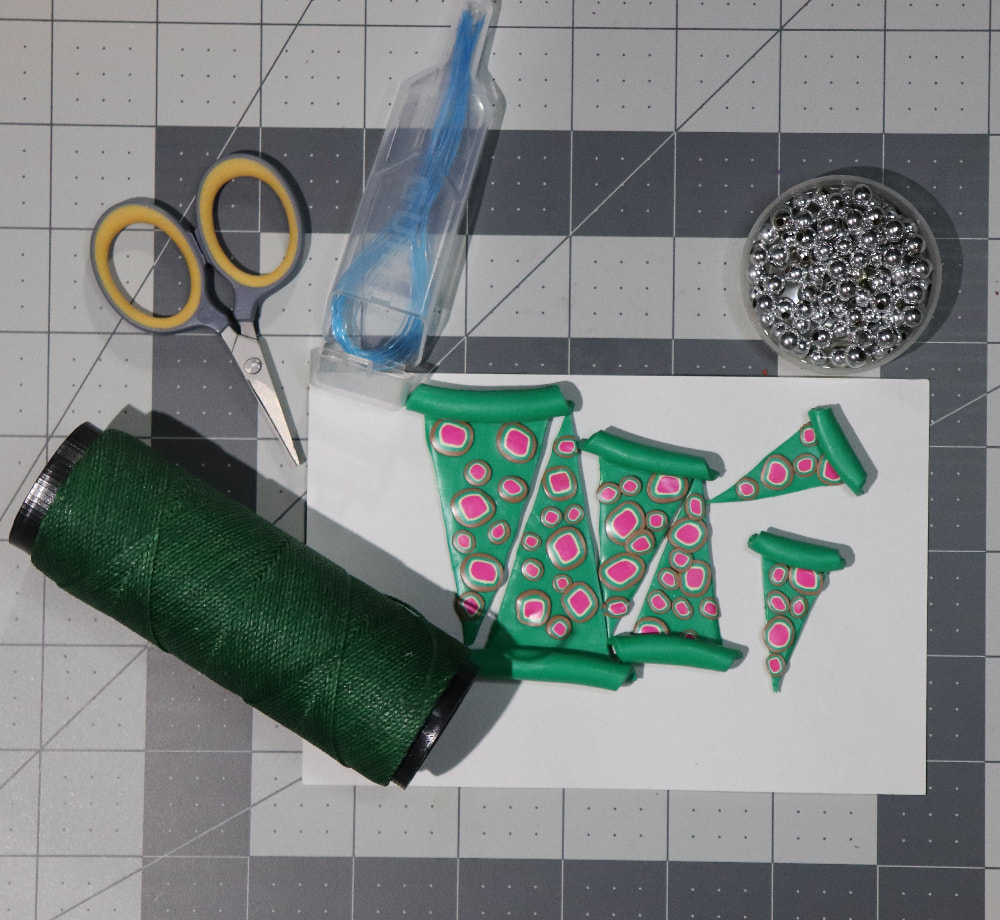
 A fun little polymer clay project! You can make these in three different sizes and string them up in your dollhouse, on a shelf, or in your own unique jewelry creations! Video first, or scroll down for written instructions with pictures. Note: Video contains some sped-up footage. VIDEOMaterials
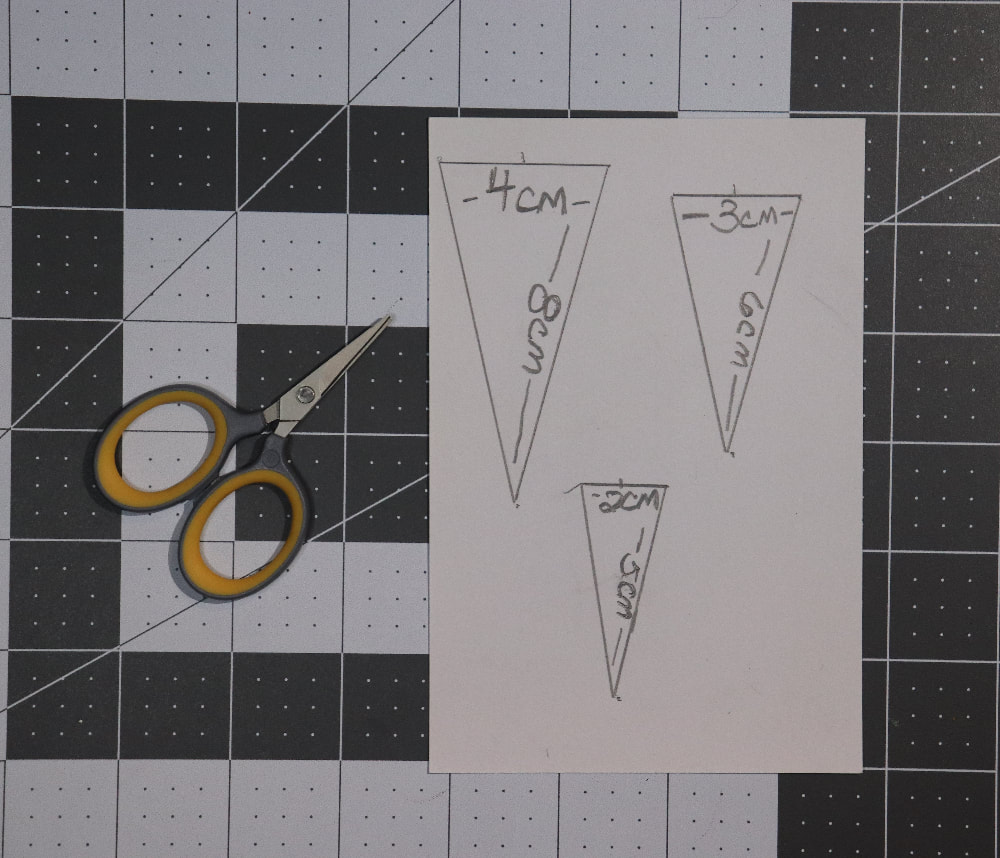
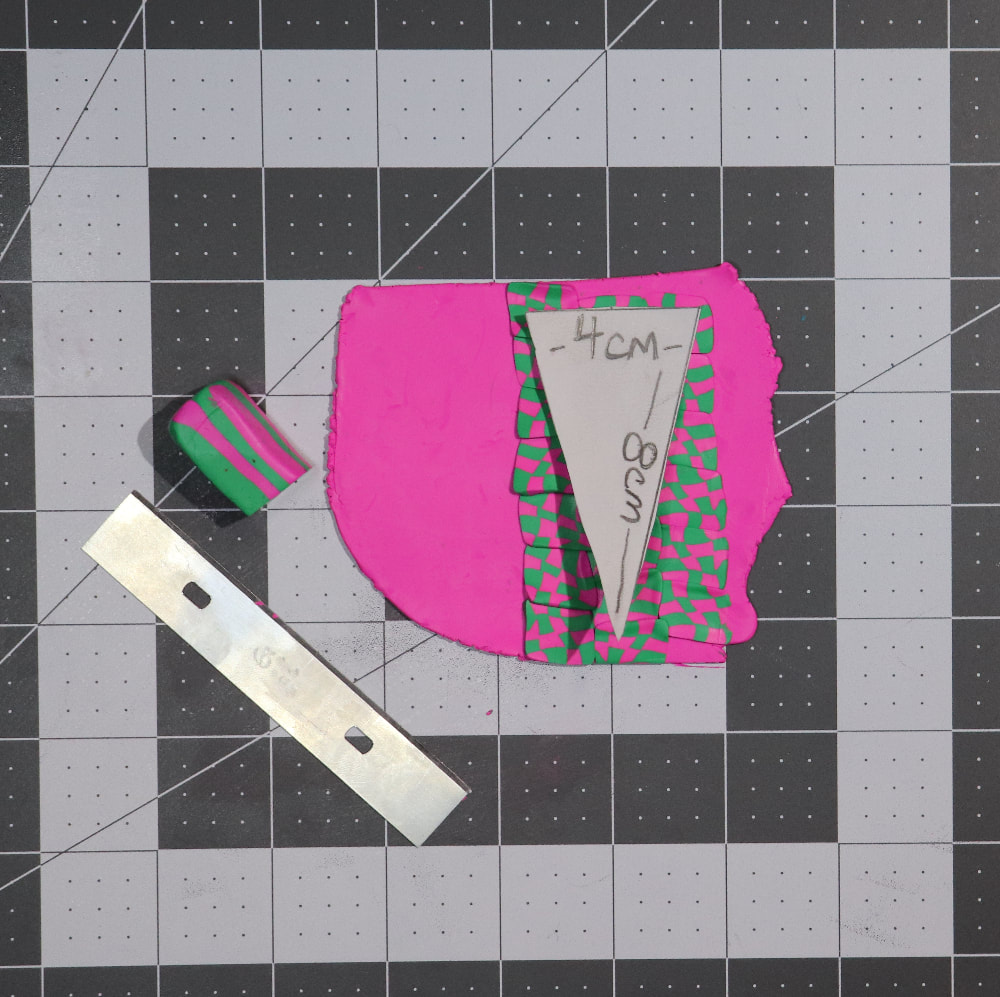
How-ToCondition clay until it is warm and pliable. Warm and reduce canes to desired size. Want to make your own canes? I have 3 instructional videos: Bullseye Cane Jellyroll Cane Checkerboard Cane Using ruler, measure and cut out three triangles from the index card to use as templates: LARGE: 4cm x 8cm x 8cm MEDIUM: 3cm x 6cm x 6cm SMALL: 2cm x 5cm x 5cm
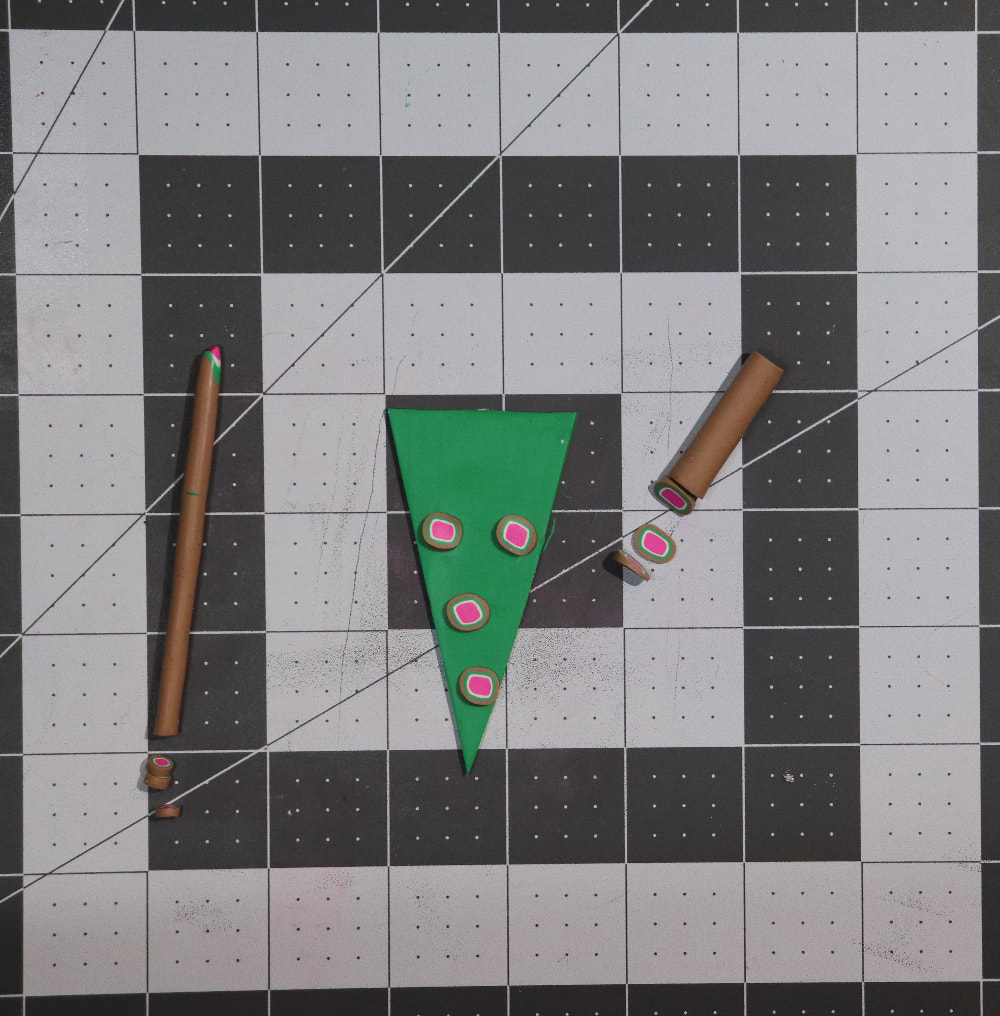
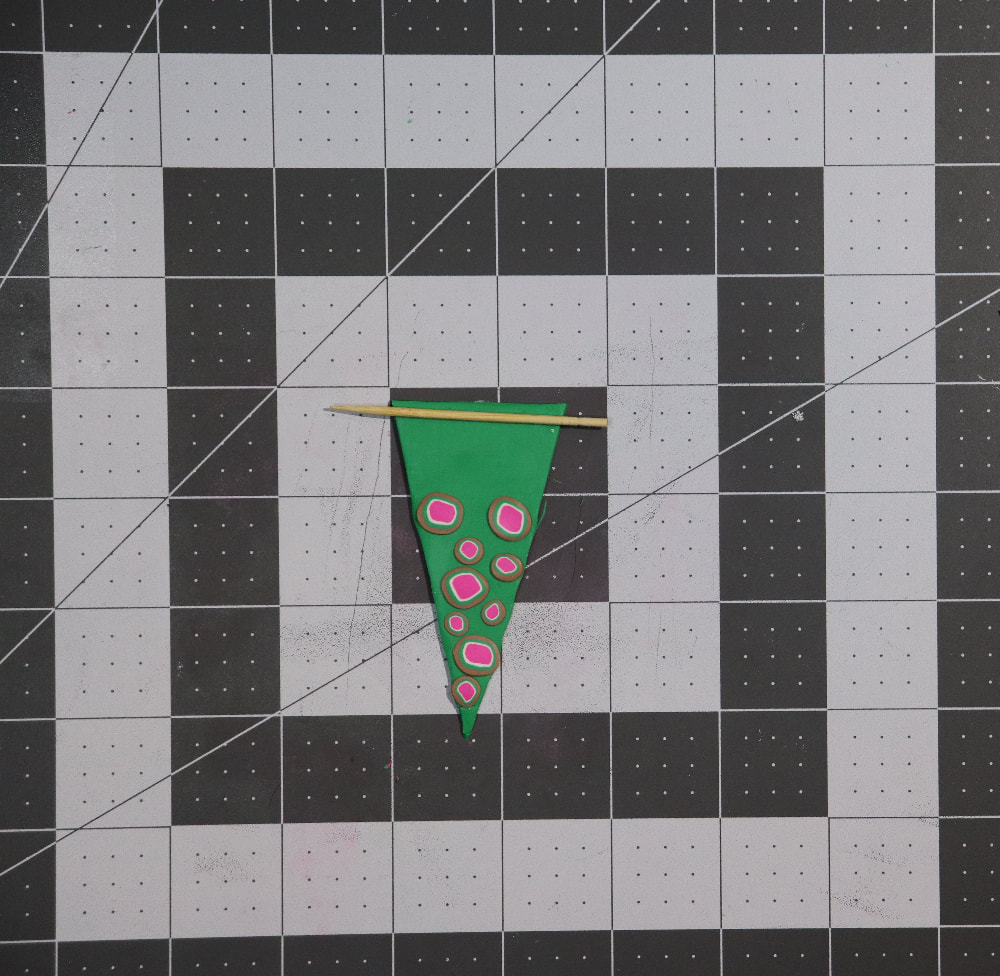
METHOD #1 Roll clay out into thin sheet (2nd thickest setting on the pasta machine, or approximately 2mm thick.) Using template as a guide, cut clay into triangles. 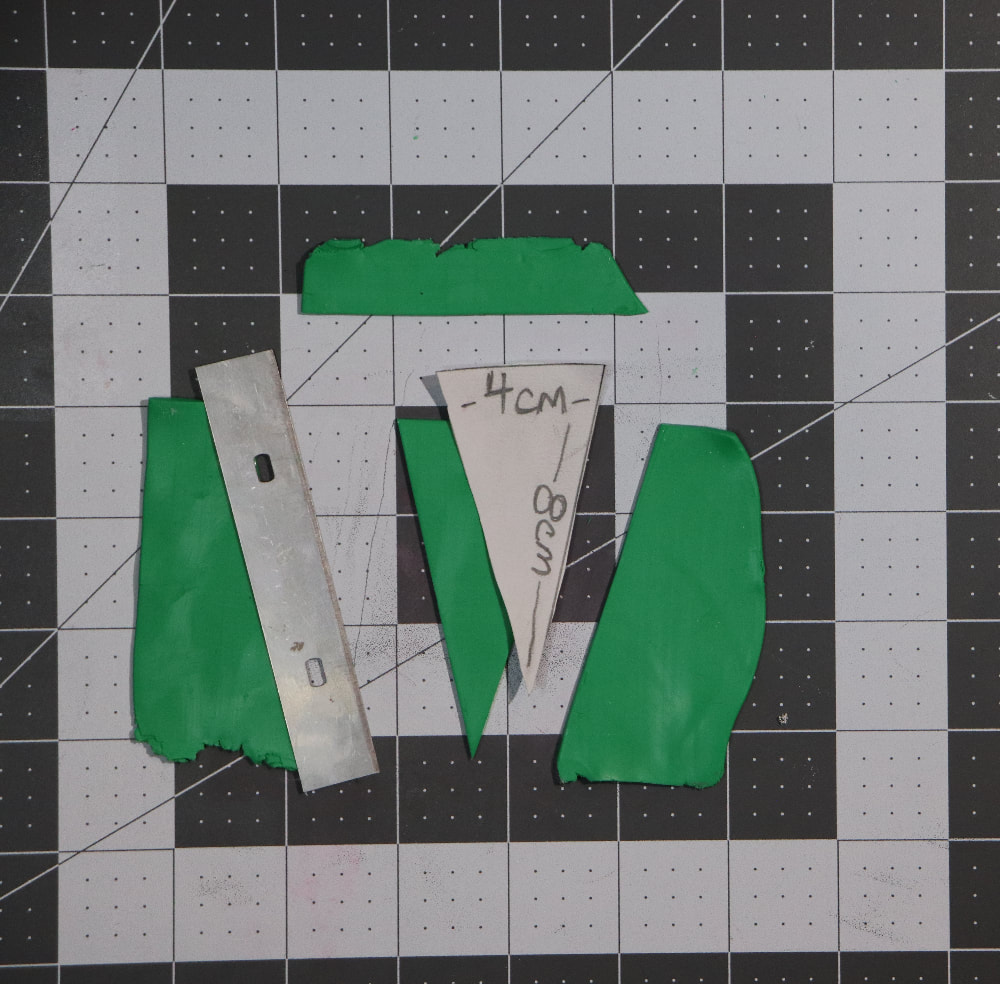 Cut cane slices and gently press onto triangle, leaving approximately the top 2 centimeters blank. Use different sizes of cane slices for interest. (For this method, leave some background space between the slices.) Use roller tool to smooth cane slice down. (Gently so you don't warp the triangle.)
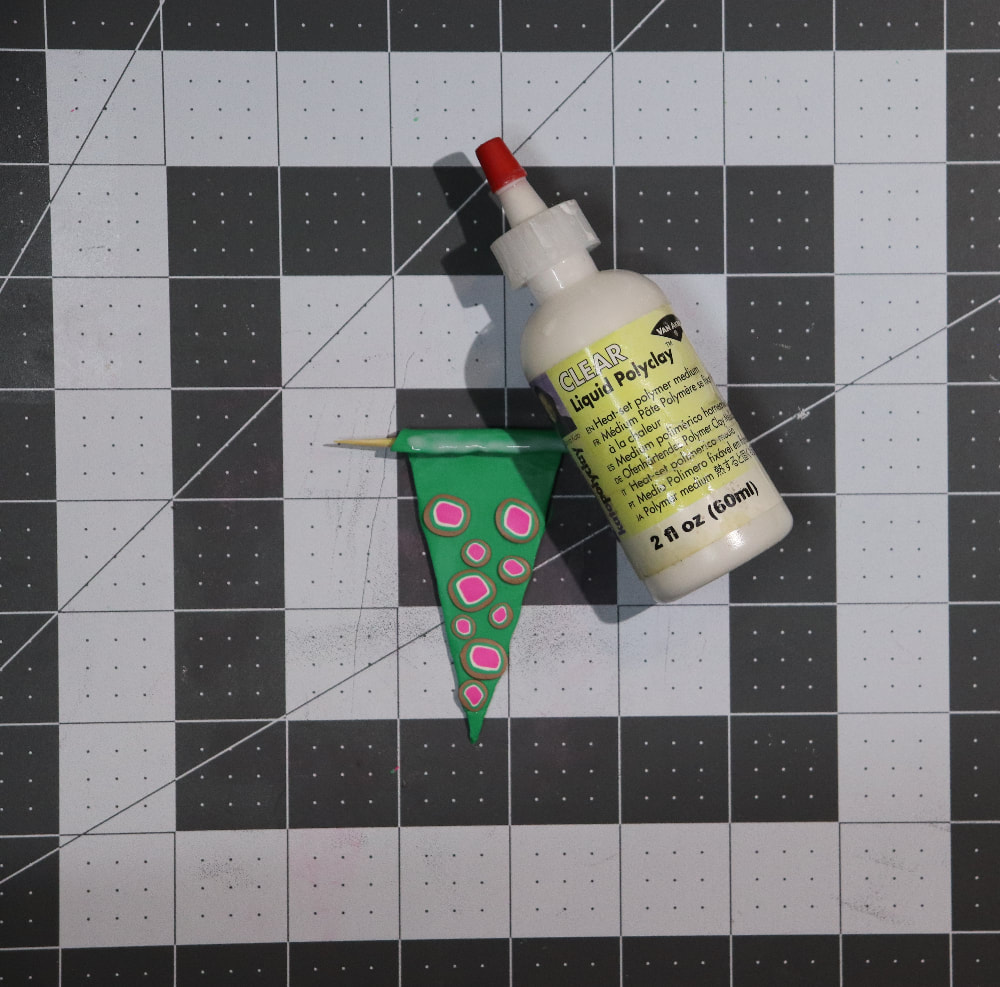
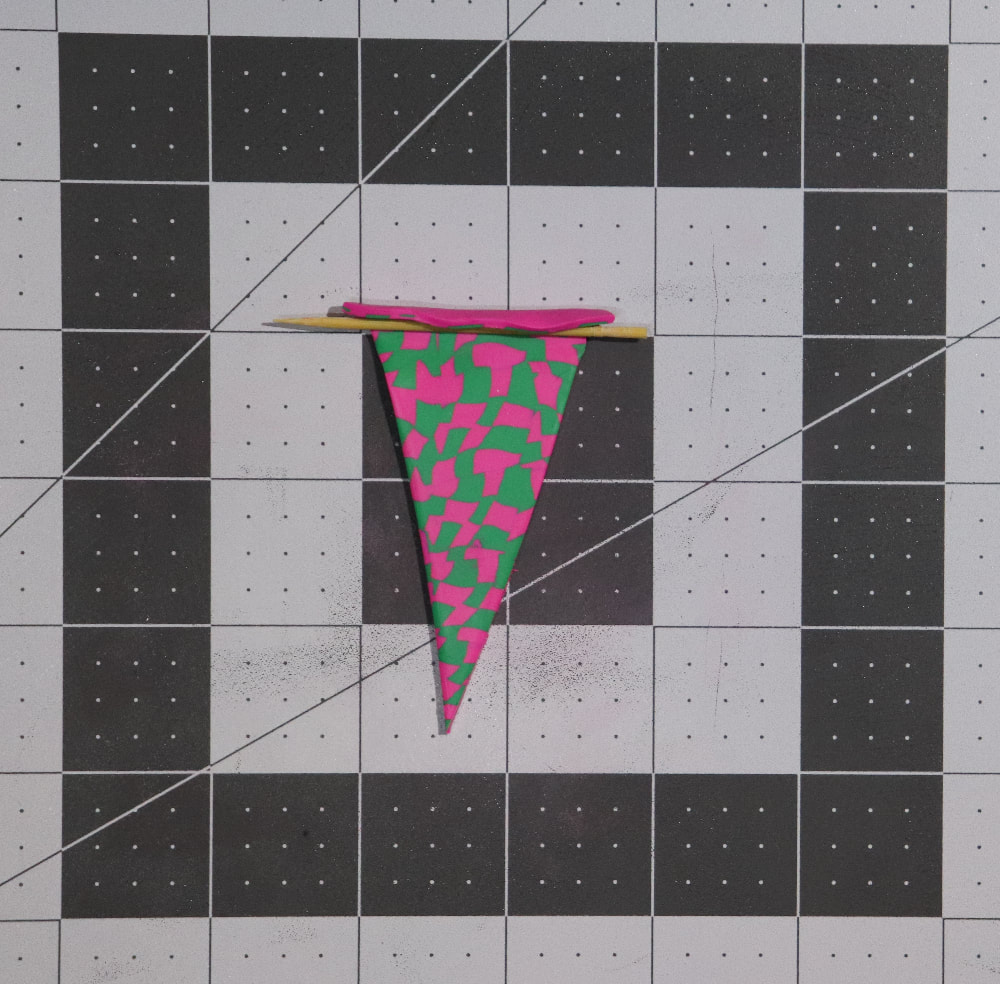
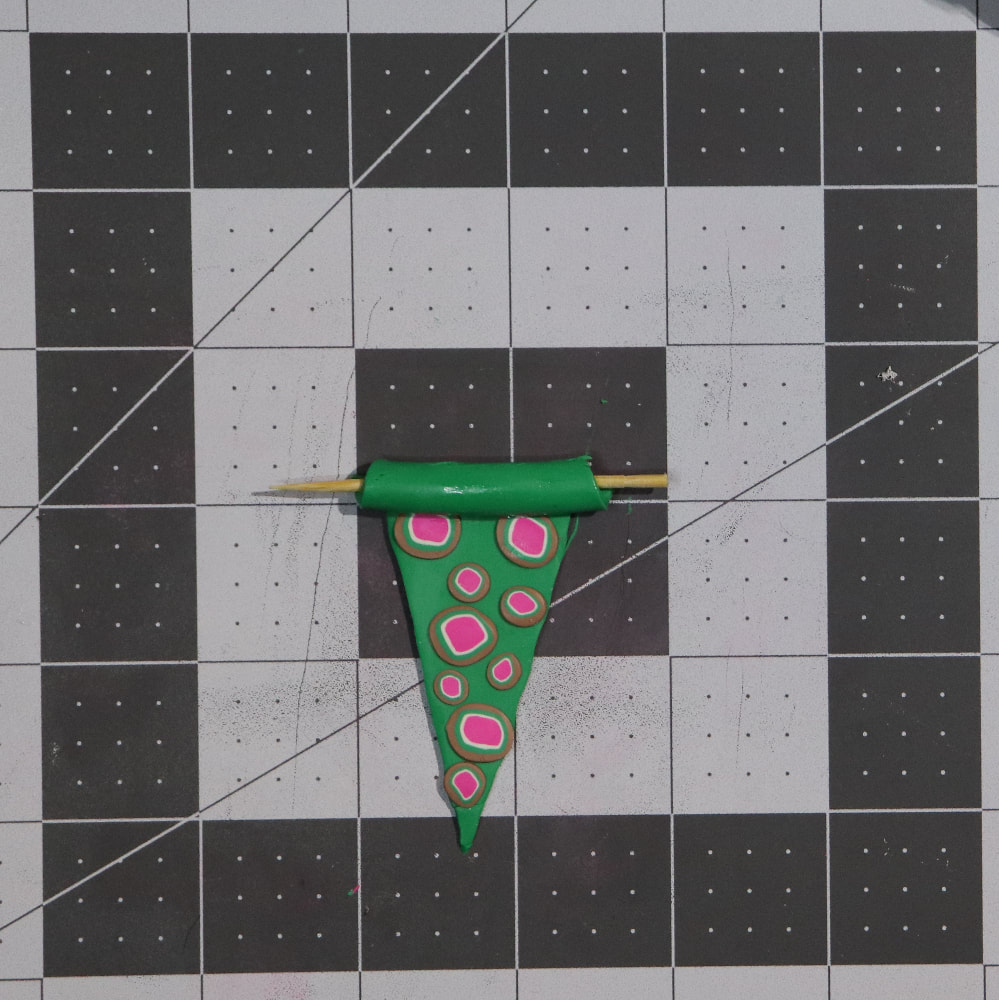
 Using toothpick, start at top and roll down to create a tube for stringing. If desired, secure with liquid clay. (recommended)
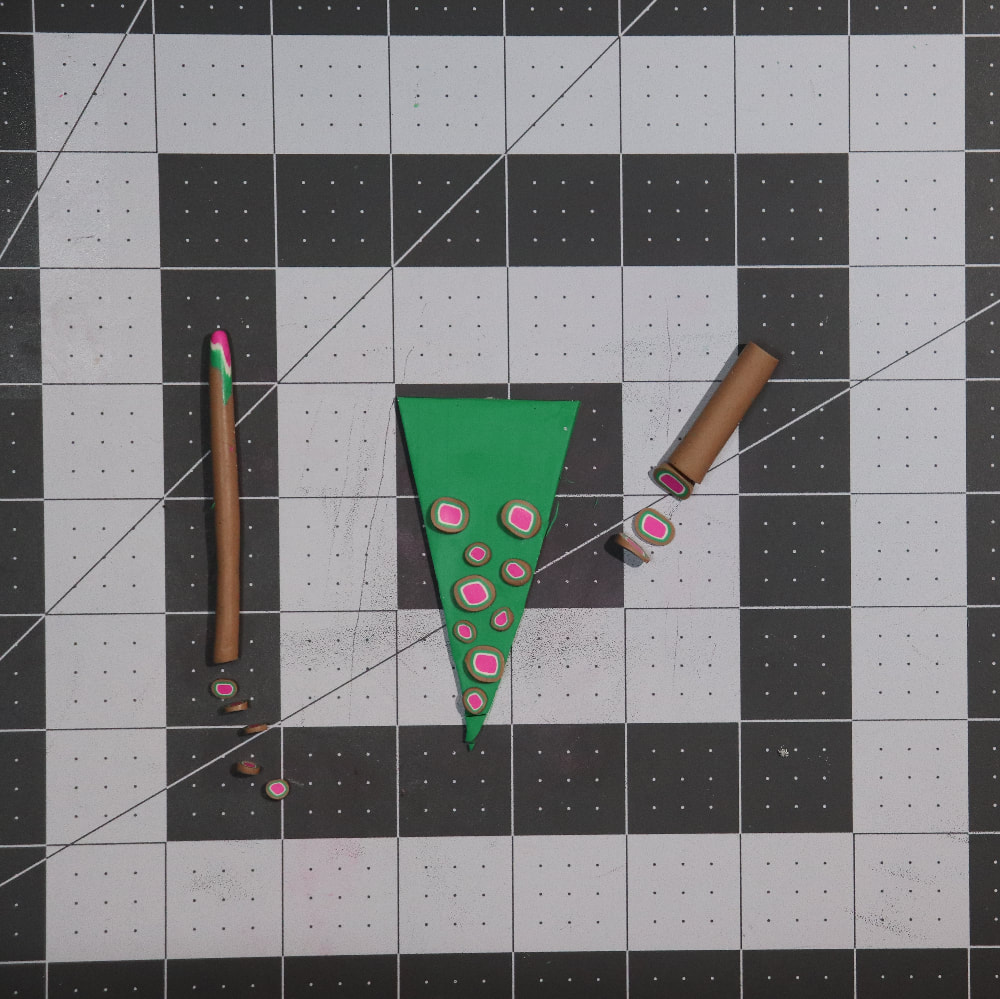
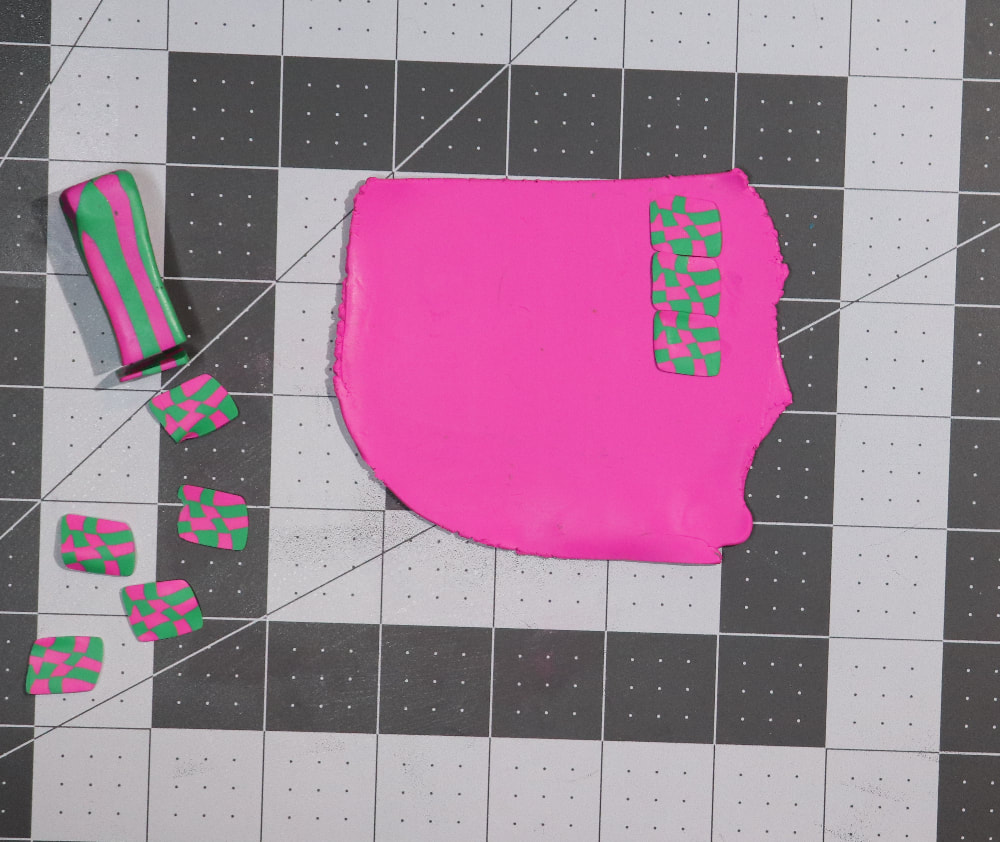
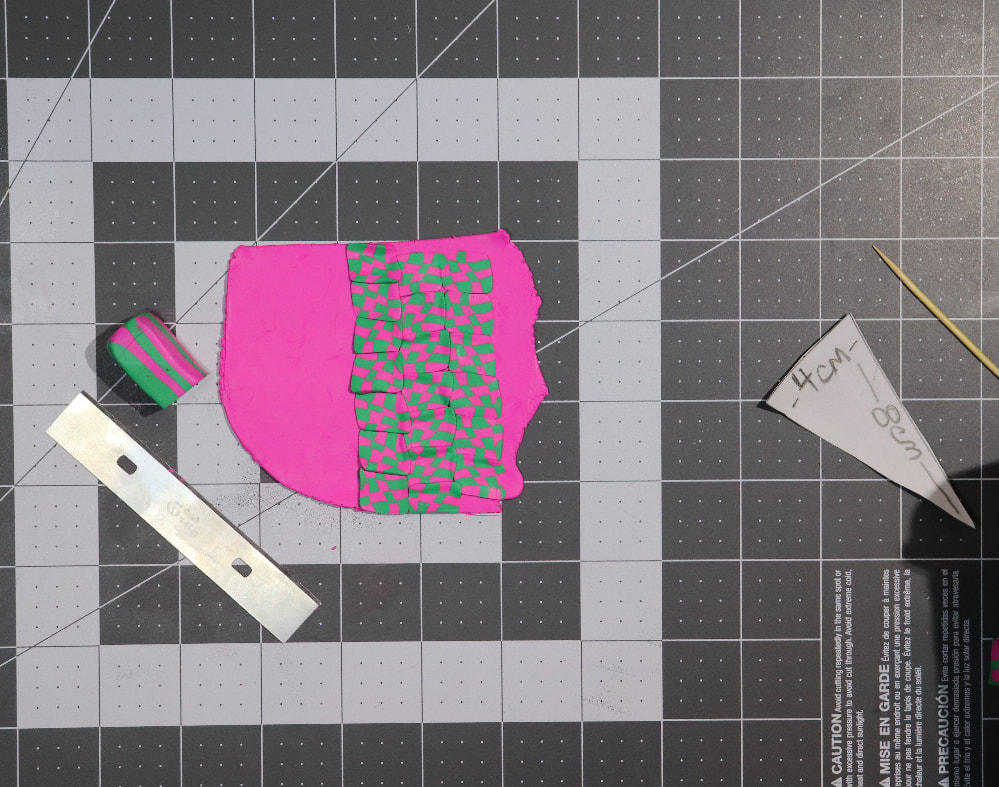
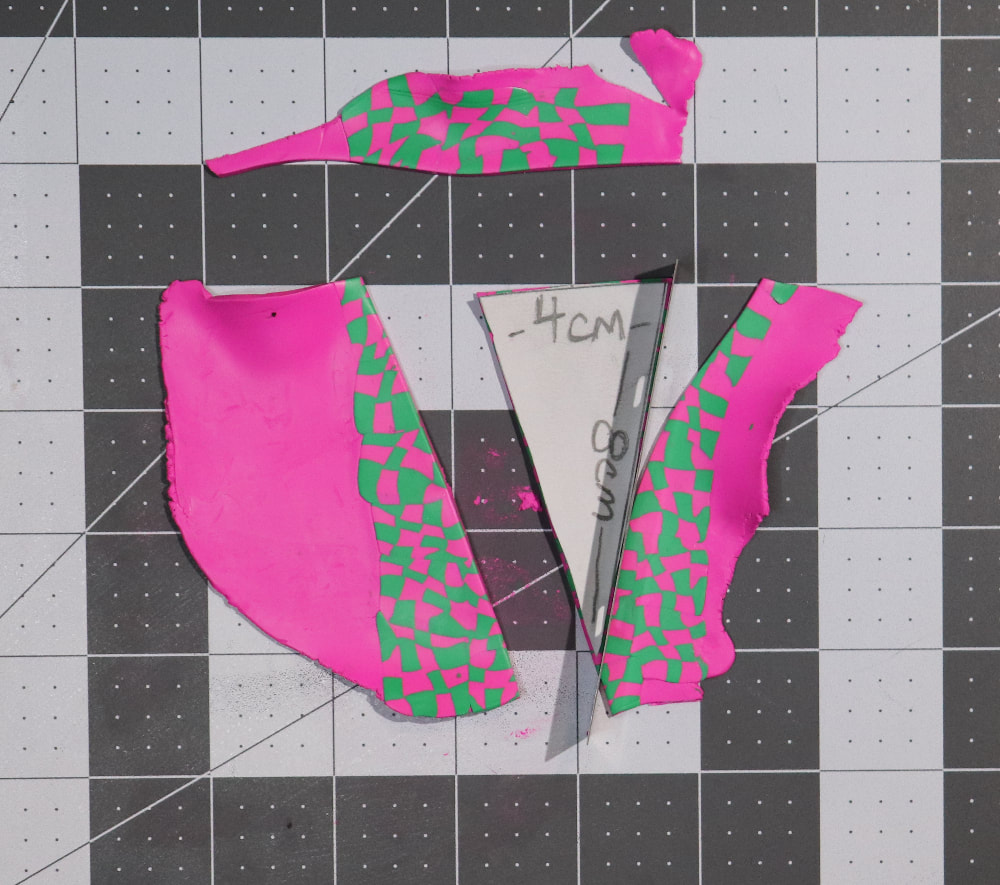
 METHOD #2 Roll out a thin sheet of clay (2nd thickest setting on the pasta machine, or about 2mm thick) Make sure it is large enough for the template you want to use, and gently press cane slices down on it. (For this method, press the edges of each slice up against each other.) Continue until you have enough covered for the size of triangle you are going to cut. Smooth with roller tool.
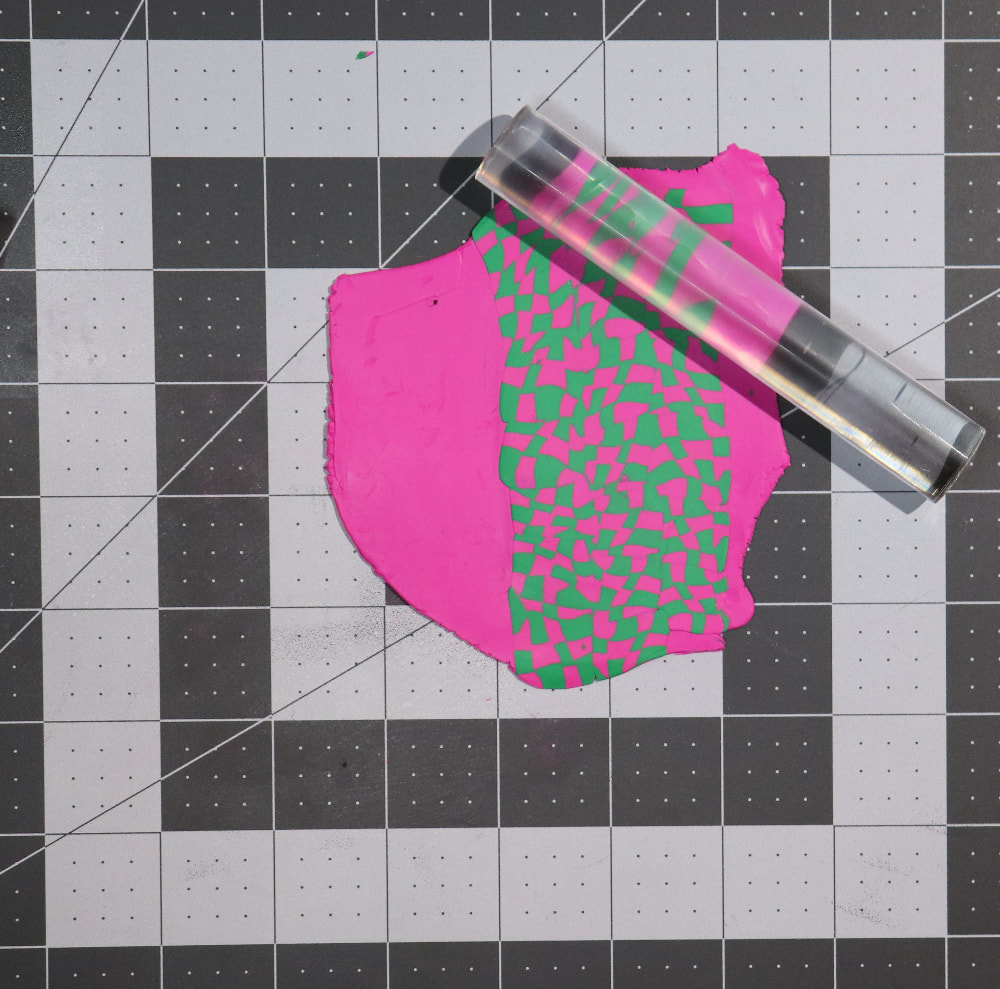 Using template, trim clay into triangle.
Using toothpick, start at top and roll down to create a tube for stringing. If desired, secure with liquid clay. (recommended)
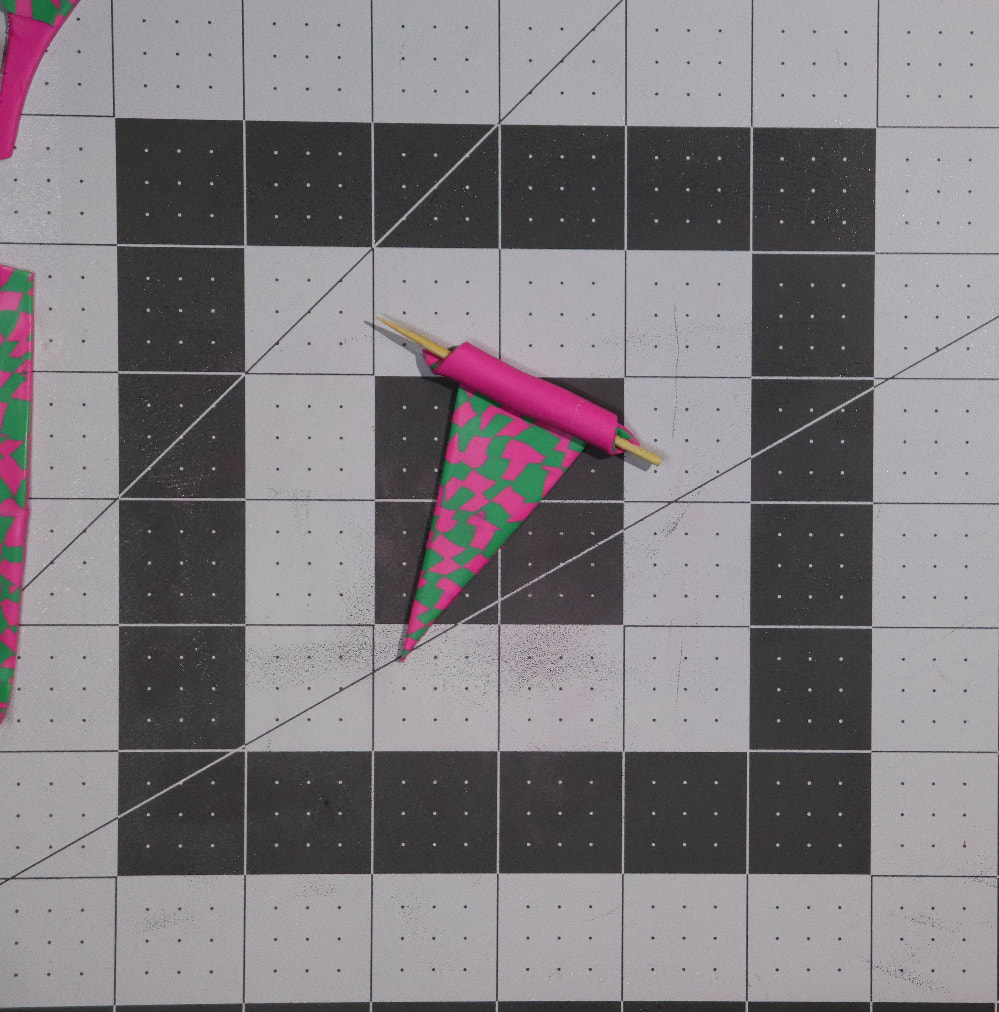
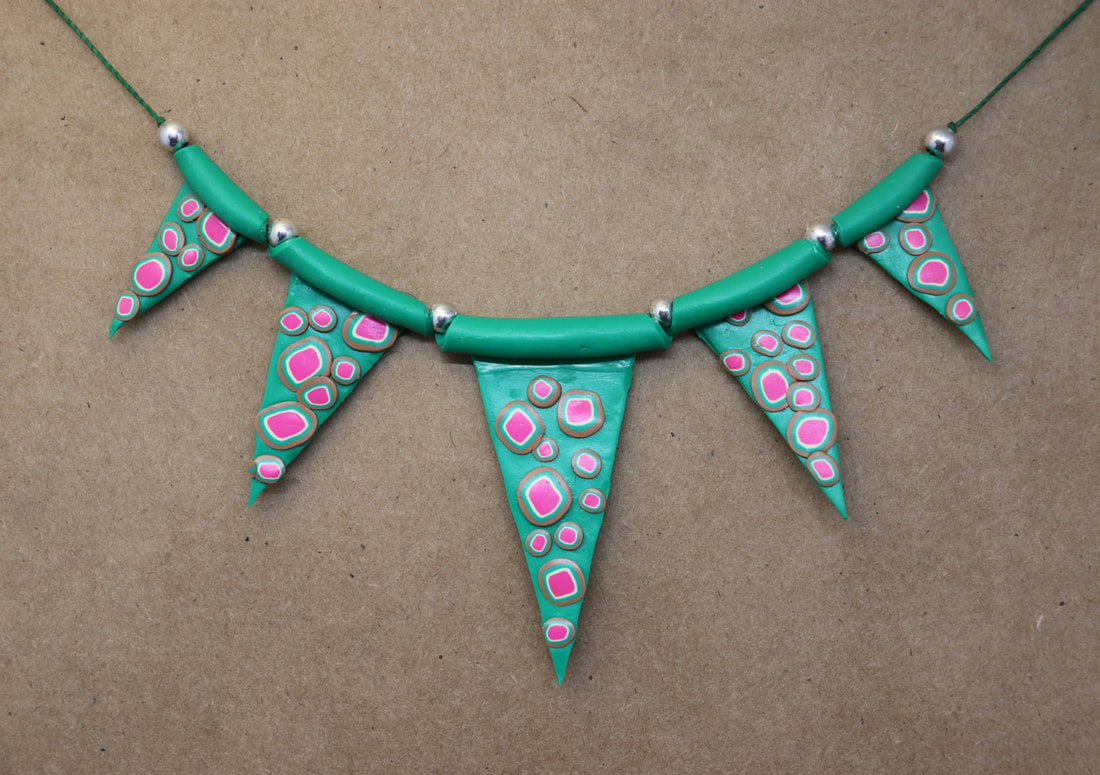
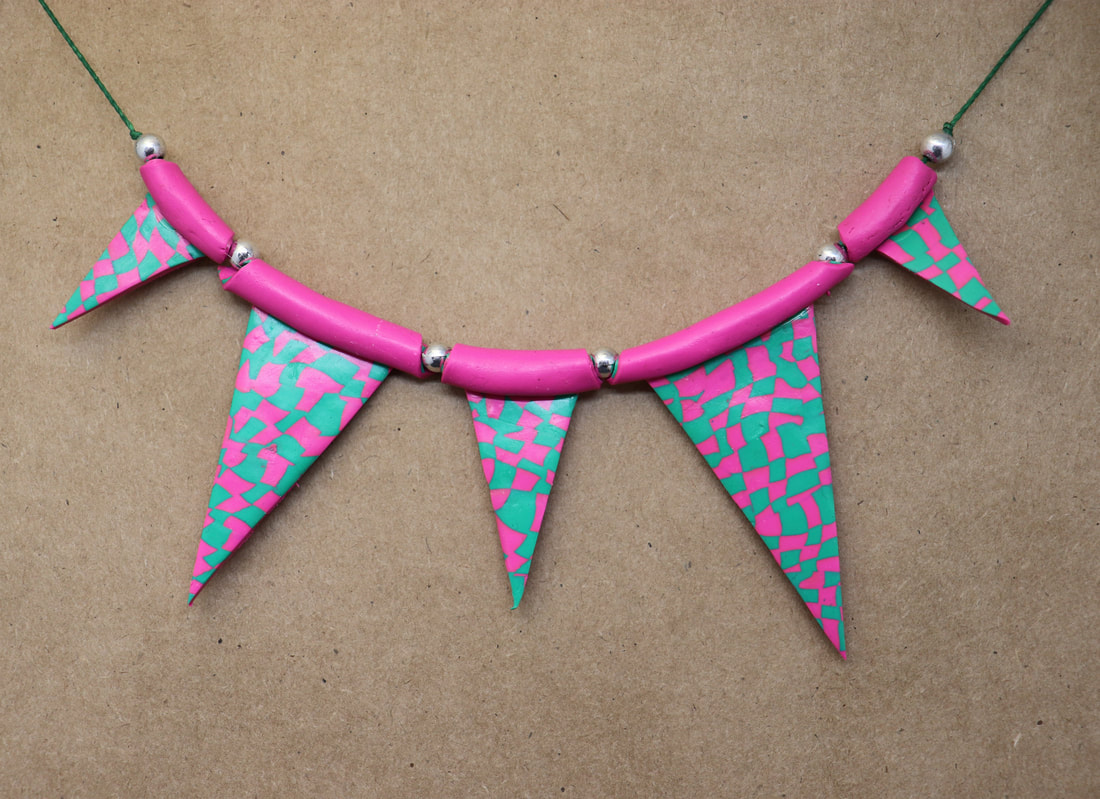
Pull out the toothpicks and gently curve the tube at the top. (Be careful not to accidentally pinch it shut!) Place triangles on cardstock or index card, and bake at the temperature indicated by the clay manufacturer. I always cover my pans with aluminum foil and bake for an hour. (Extended time is not a problem, but be careful about the temperature. An oven thermometer is always a good idea when baking polymer clay!) 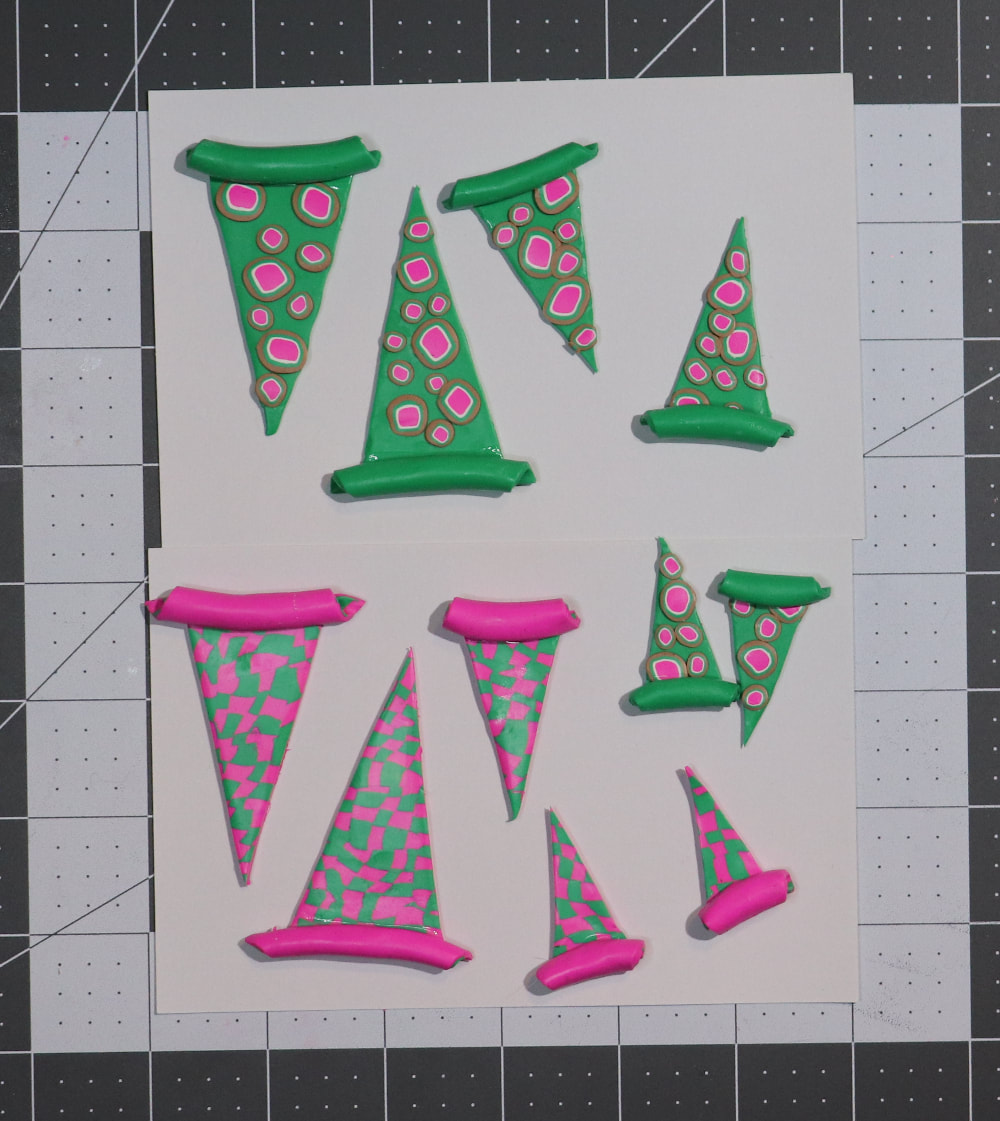 String on cord with a bead between each triangle. Floss threaders from the toothbrush aisle make good inexpensive, flexible needles. Now you can hang it up in your dollhouse, add a cute accent to a small shelf, or use them in your own unique jewelry creations!
 |